Finding server information is vital when monitoring servers and is usually pretty easy to find on SQL Servers, however when monitoring web or app servers this may be a bit of a challenge when SQL querying is not at your disposal. This post will talk about the SSIS task “WMI Data Reader” and how it can help you monitor your non-SQL Servers.
First, a short introduction to WMI….
WMI (Windows Management Instrumentation) is used for accessing management information in an enterprise environment. The ability to obtain management data from remote computers is what makes WMI useful. It provides a consistent approach to carrying out day-to-day management tasks with programming or scripting languages – MSDN
Some things you can do with WMI may include:
- Rebooting a computer remotely
- Get a list of applications installed on a local or remote computer
- Find OS info such as the version of Windows and service pack levels
- Query the event logs on a local or remote computer
- Find system information such as Manufacturer and Model of a computer
As you can see, WMI is a very powerful tool and can be used locally or remotely.
There are tons of different metrics you can capture using WMI scripts, but for this example I’ll capture disk space information using the Win32_LogicalDisk class and insert it into a database table using a SSIS package.
First, let’s create our database table that will store our disk information:
CREATE TABLE DiskInfo
(
Drive varchar(4),
DriveSize numeric(18,2),
FreeSpace numeric(18,2),
[Date] Datetime Not NUll Default GetDate()
)
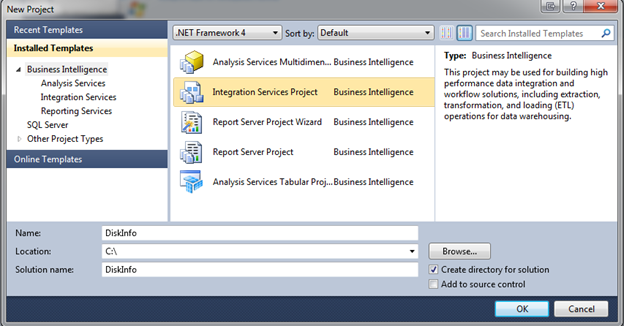
Once our table is created, we can create the SSIS package. Open BIDS or SSDT and create a new Integration Services project.

From the SSIS toolbox, drag the WMI Data Reader Task into the Design view.
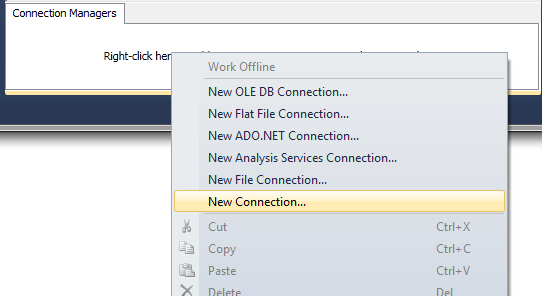
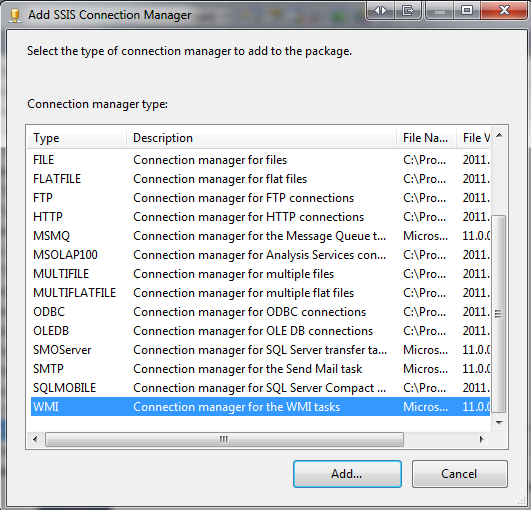
Right click in the Connection Manager window and select New Connection and select WMI. Click Add:
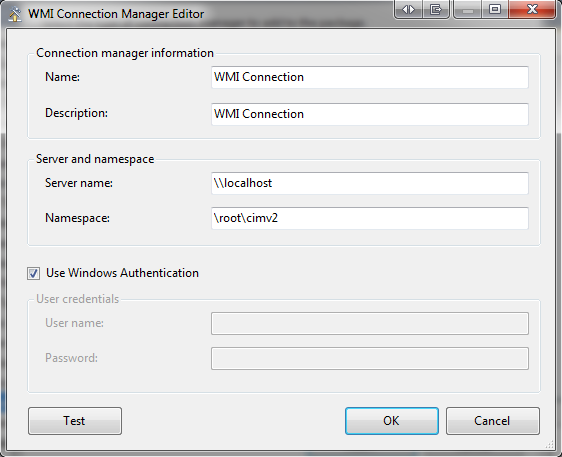
This will open the WMI Connection Manager Editor. Give the connection manager a name and description. If you are creating the package for a local computer then use \\localhost to connect. If you are creating the package for a remote server then use \\RemoteServer to connect. For this example, I’m connecting locally using Windows Authentication:
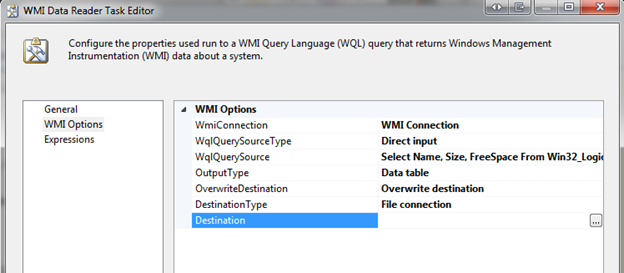
Next we’ll need to right click on the WMI Data Reader Task and choose edit. Click the WMI Options tab. This tab is where we will need to input information such as the WMI connection string and the WMI query. For this example, I have used the following:
- WMI connection – This is the connection we created in the previous step.
- WqlQuerySourceType – Direct input
- WqlQuerySource – Select Name, Size, FreeSpace From Win32_LogicalDisk Where DriveType = 3
- OutputType – Data table
- OverwriteDestination – Overwrite destination
- DestinationType – File connection
- Destination – New destination (see below)