Finding the right high availability option can be tricky. The decision really depends on these items:
- Needs
- Budget
- Scope
- SQL Server version
- Level of automation
- Team level support
- etc.
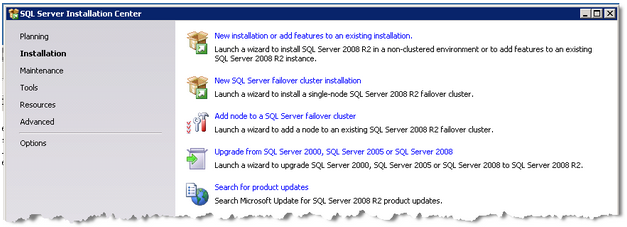
At a high level, there are five main high availability options including a new feature set to be release with SQL Server 2012:
- Replication
- Mirroring
- Log Shipping
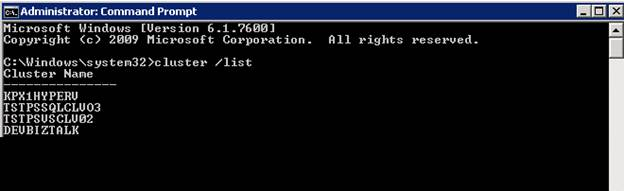
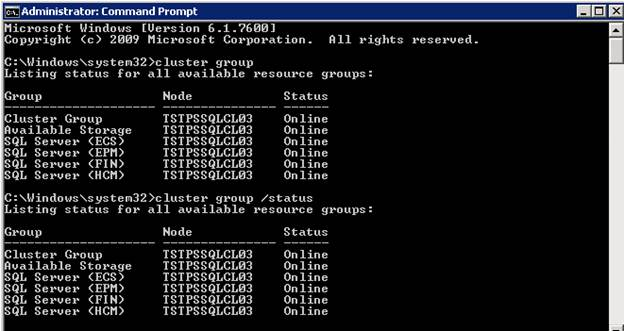
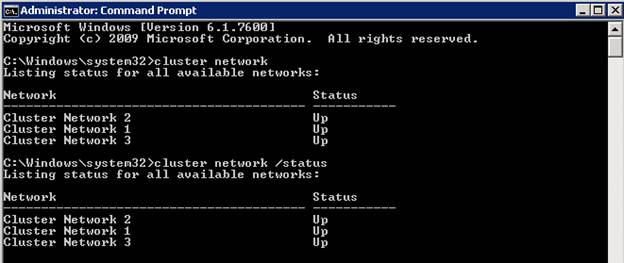
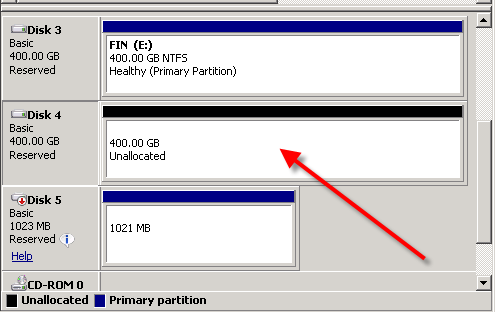
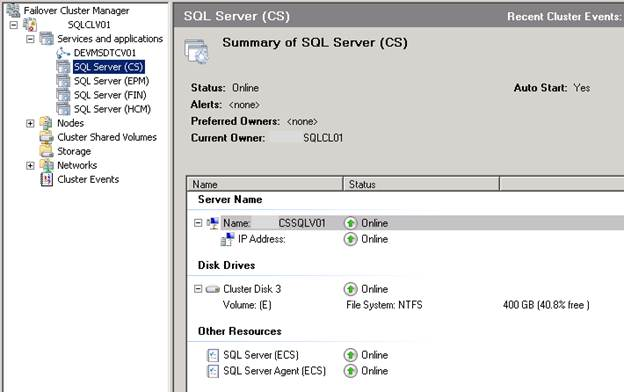
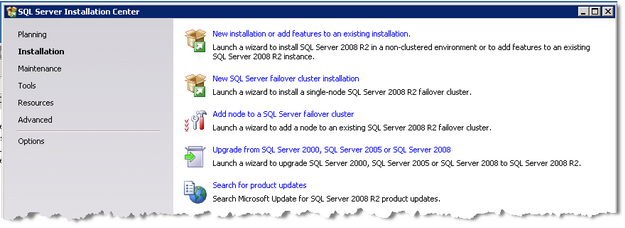
- Clustering
- AlwaysON
SQL Server Replication Overview
At a high level, replication involves a publisher and subscriber, where the publisher is the primary server and the subscriber is the target server. Replication’s main purpose is to copy and distribute data from one database to another. There are four types of replication that we will outline:
- Snapshot replication
- Transactional replication
- Merge replication
- Peer to Peer replication
Snapshot: Snapshot replication occurs when a snapshot is taken of the entire database and that snapshot is copied over to the subscriber. This is best used for data that has minimal changes and is used as an initial data set in some circumstances to start subsequent replication processes.
Transactional: Transactional replication begins with a snapshot of the primary database that is applied to the subscriber. Once the snapshot is in place all transactions that occur on the publisher will be propagated to the subscriber. This option provides the lowest latency.
Merge: Merge replication begins with a snapshot of the primary database that is applied to the subscriber. Changes made at the publisher and subscriber are tracked while offline. Once the publisher and subscriber are back online simultaneously, the subscriber synchronizes with the publisher and vice versa. This option could be best for employees with laptops that leave the office and need to sync their data when they are back in the office.
Peer to Peer: Peer to Peer replication can help scale out an application. This is because as transactions occur they are executed on all of the nodes involved in replication in order to keep the data in sync in near real time.
| Pros and Cons for SQL Server Replication |
|
Pros
|
Cons
|
|
Can replicate to multiple servers
|
Manual failover
|
|
Can access all databases being replicated
|
Snapshot can be time consuming if you have a VLDB
|
|
Replication can occur in both directions
|
Data can get out of sync and will need to re-sync
|
SQL Server Database Mirroring Overview
Database Mirroring involves a principal server that includes the principal database and a mirror server that includes the mirrored database. The mirror database is restored from the principal with no recovery leaving the database inaccessible to the end users. Once mirroring is enabled, all new transactions from the principal will be copied to the mirror. The use of a witness server is also an option when using the high safety with automatic failover option. The witness server will enable the mirror server to act as a hot standby server. Failover with this option usually only takes seconds to complete. If the principal server was to go down the mirror server would automatically become the principal.
Click here to view the rest of this post.