This post is branching off of another post I wrote recently, “Move an On Premise SQL Server Database to the SQL Azure Cloud” where I explained how to move an on premise database to the cloud using the Export/Import Data-tier application. After some comments on this tip, research and testing I think it would be beneficial for the SQL community to understand the different options of moving to the cloud.
If you’d like to follow along with the examples I would suggest creating a free (trial) account at http://www.windowsazure.com. Once you are logged into the Windows Azure portal a SQL Server will need to be created.
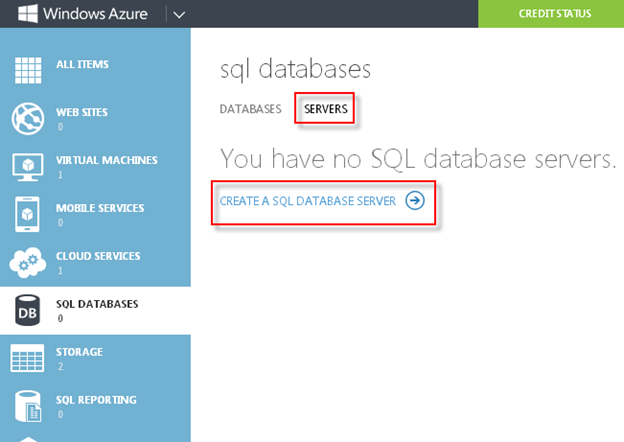
Click on SQL Databases, Servers, Create a SQL Database Server:
Create a login name, password, and choose your region and click the check mark:

A new SQL Server should be built in a few seconds! Click Manage at the bottom and a few firewall rules options may appear. Click Yes on all of them.

Next, click on the server, and click Dashboard:
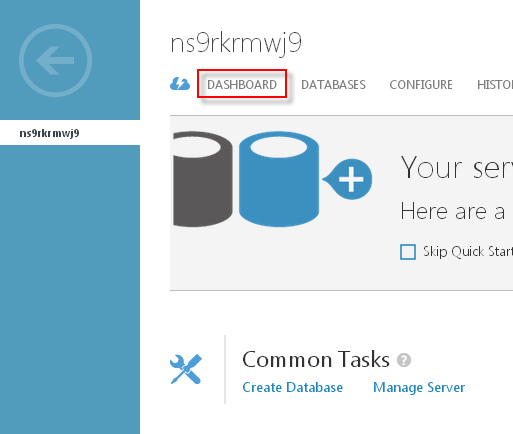
On the right side of the screen you will see the full SQL Server name. In this example, the name is ns9rkrmwj9.database.windows.net. Write this name down, you’ll need it later.

Now that we have a SQL Azure Server built, let’s move our databases.
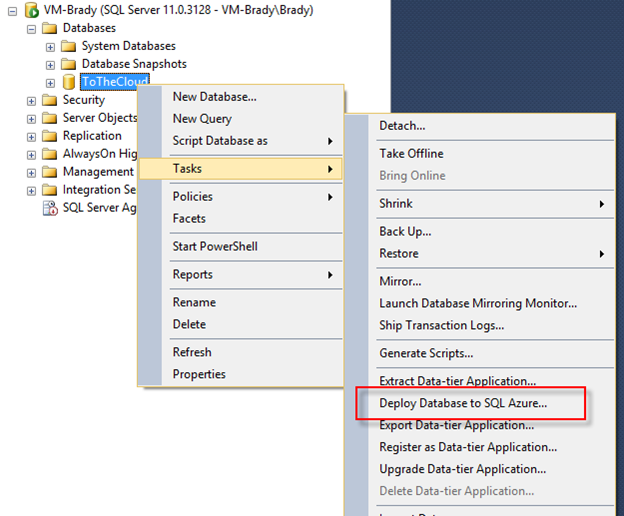
Option 1: Using the Deploy Database to SQL Azure Wizard
In SQL Server 2012, there is a new wizard that will allow you to move an on premise database to SQL Azure. This is only available in SQL Server 2012 since SQL Azure was nonexistent in previous versions.
To use this wizard, open SQL Server Management Studio (SSMS) and connect to the server. Right click the database you want to move, click Tasks, Deploy Database to SQL Azure…
Click here to view the rest of this post.