From Microsoft, the Conditional Split transformation can route data rows to different outputs depending on the content of the data. The implementation of the Conditional Split transformation is similar to a CASE decision structure in a programming language. The transformation evaluates expressions, and based on the results, directs the data row to the specified output. This transformation also provides a default output, so that if a row matches no expression it is directed to the default output.
You can configure the Conditional Split transformation in the following ways:
- Provide an expression that evaluates to a Boolean for each condition you want the transformation to test.
- Specify the order in which the conditions are evaluated. Order is significant, because a row is sent to the output corresponding to the first condition that evaluates to true.
- Specify the default output for the transformation. The transformation requires that a default output be specified.
Let’s take a look at how this transformation might be used in the real world.
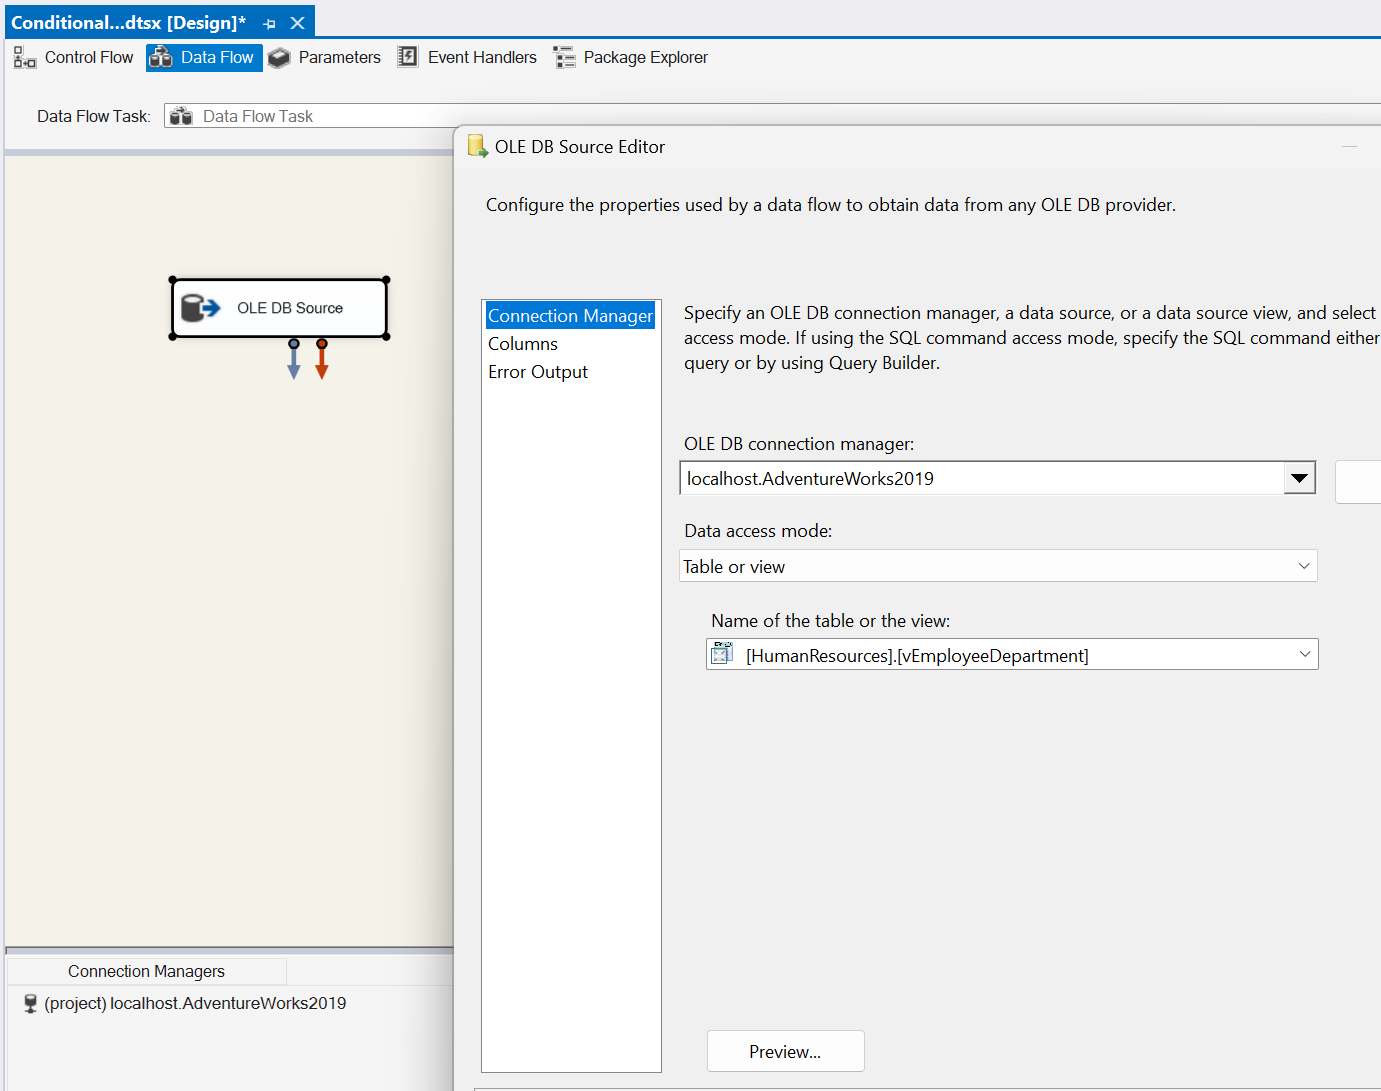
Open Visual Studio and drag a Data Flow task into the design pane. Open the Data Flow task and drag in an OLE DB Source task. For this post, I’m going to use the AdventureWorks2019 database and the HumanResources.vEmployeeDepartment view.
This view has some good data to play around with, but we’re going to focus on the Department and Start Date columns. Let’s pretend the bossman needs to see all of the Employees in the Quality Assurance (QA), Production and Sales Department in a separate database table. Bonus, he needs to see all of the Production employees split up into two more tables based on who started before and after Jan 1, 2010. All other employees can go into their own table. Got it? Great! That’s 5 total tables. QA=1, Production=2, Sales=1, Leftovers=1 Let’s go.
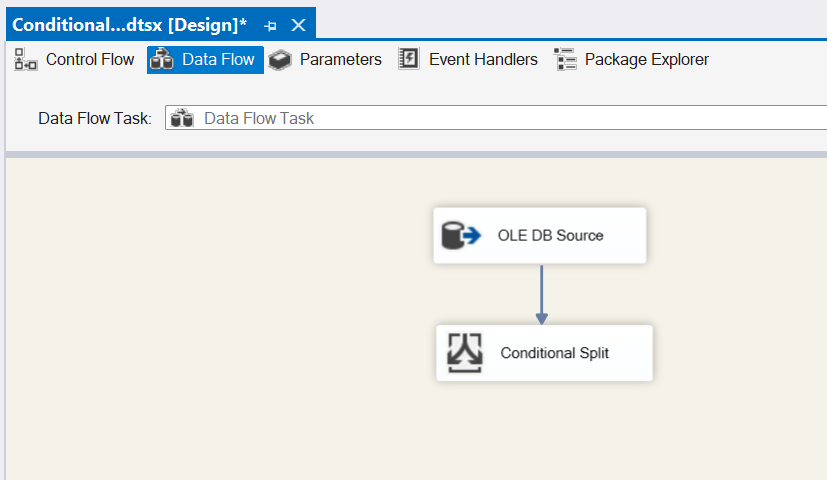
Back in Visual Studio, drag in a Conditional Split task and connect it to our OLE DB Source.
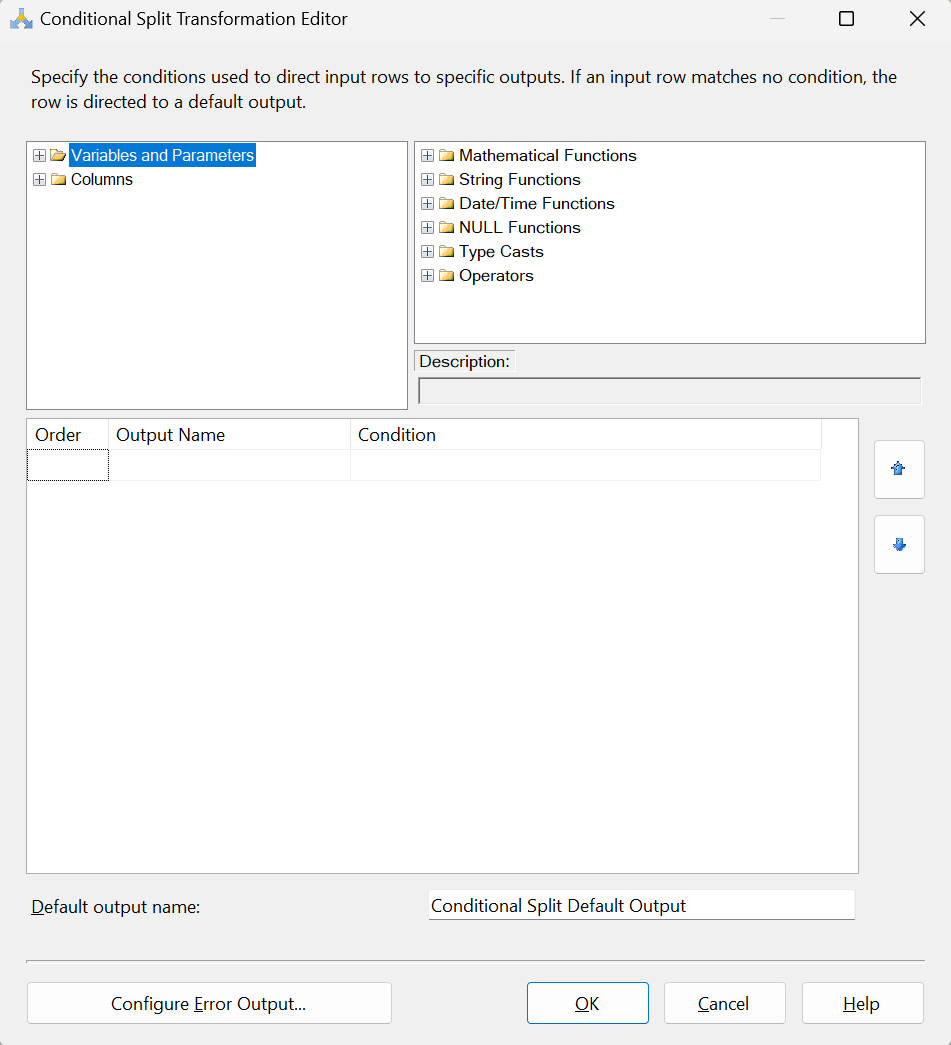
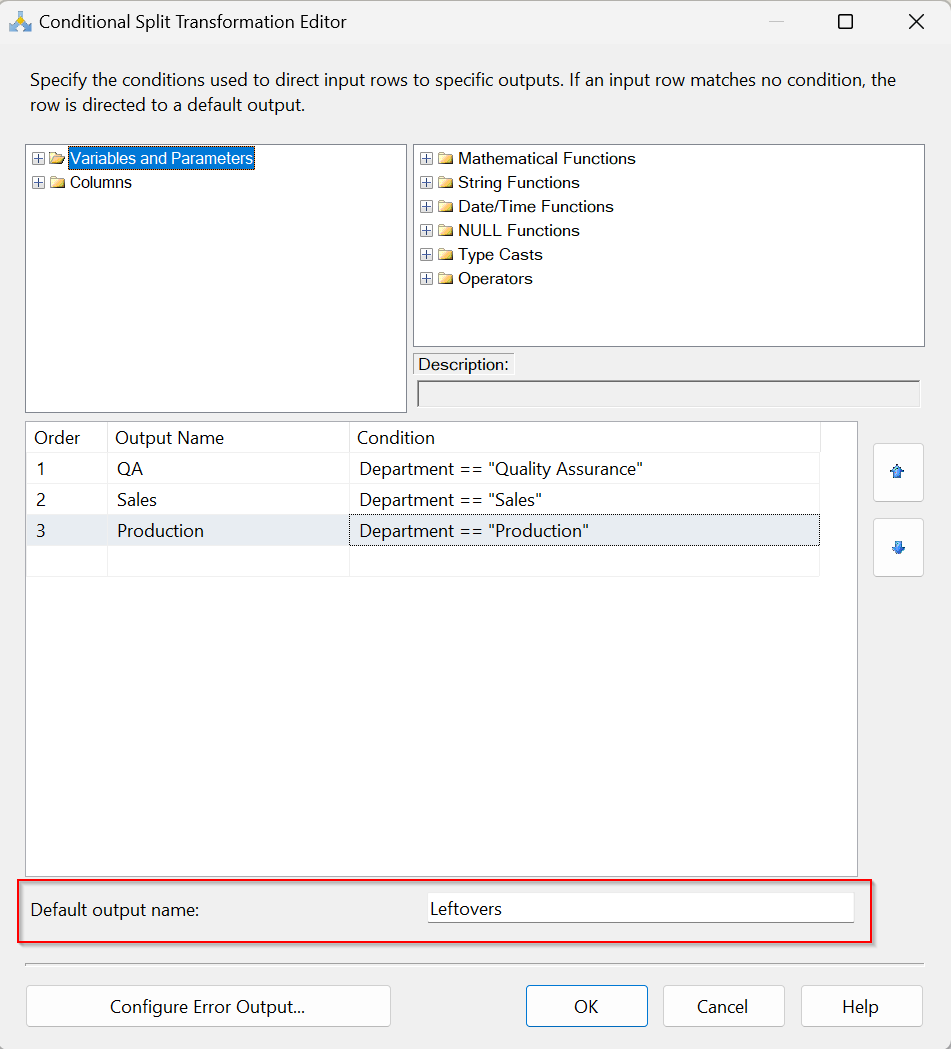
Open the Conditional Split task editor and you’ll see a few options (from left to right, top to bottom):
- We can use columns and/or variables and parameters in our expressions that define how to split the data flow.
- We can use functions such as Date/Time, NULL and String in our expressions that define how to split the data flow.
- These are the conditions that define how to split the data flow. These need to be set in priority order; any rows that evaluate to true for one condition will not be available to the condition that follows.
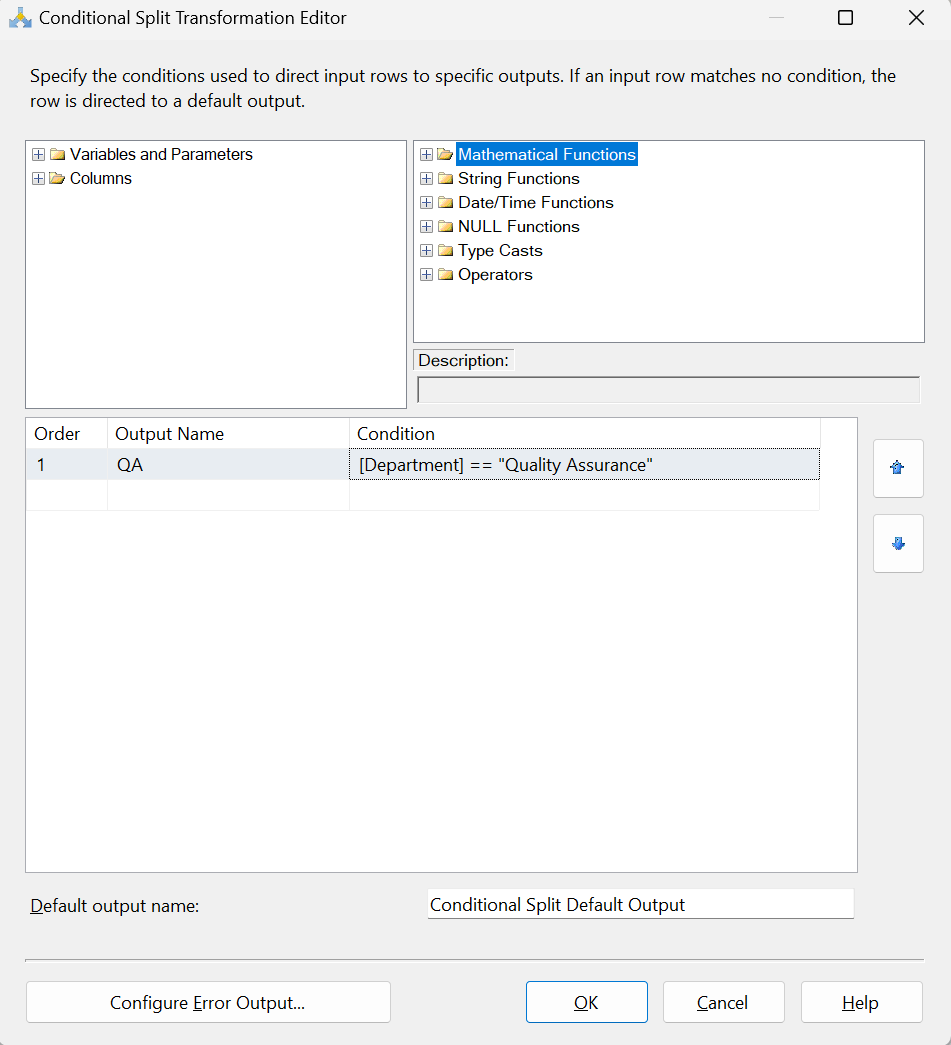
Let’s start adding some conditions for our data. First, we’ll add a condition for all of our QA Department Employees. I’ll name the output “QA” and my condition is pretty simple whereas Department == “Quality Assurance”.
I’ll do the same for Production, Sales and Leftovers (everything else that doesn’t satisfy a condition). Since Leftovers is everything else we’ll just change the name of the Default Output name to identify it.
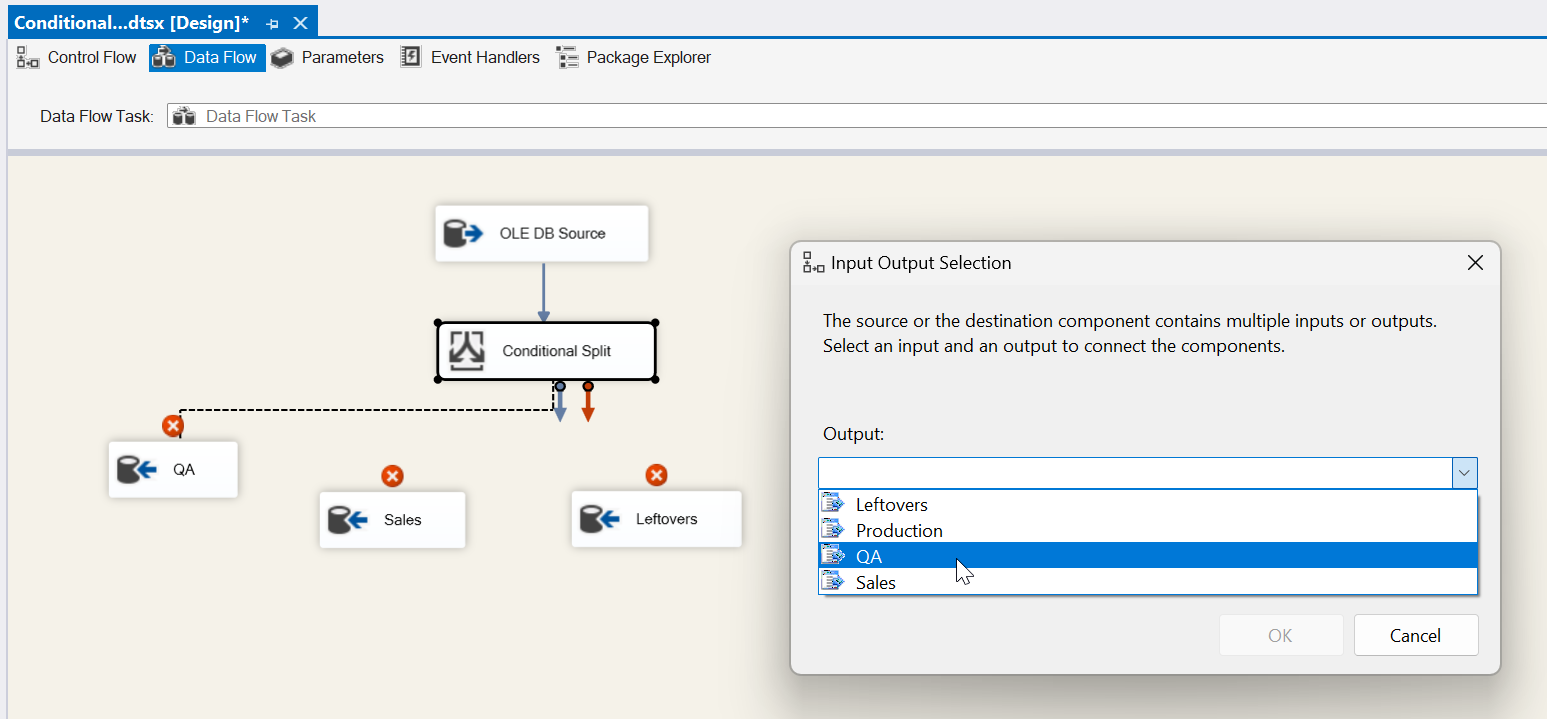
Let’s go ahead and add our destination tasks (except for Production since we need another condition) and link them to the appropriate condition. See below for QA as an example. When we drag our connector to our destination task we get prompted with an Input Output Selection box. Here is where we choose our Condition that will match up with our table. For the screenshot below, we’ll choose QA output for our QA destination.
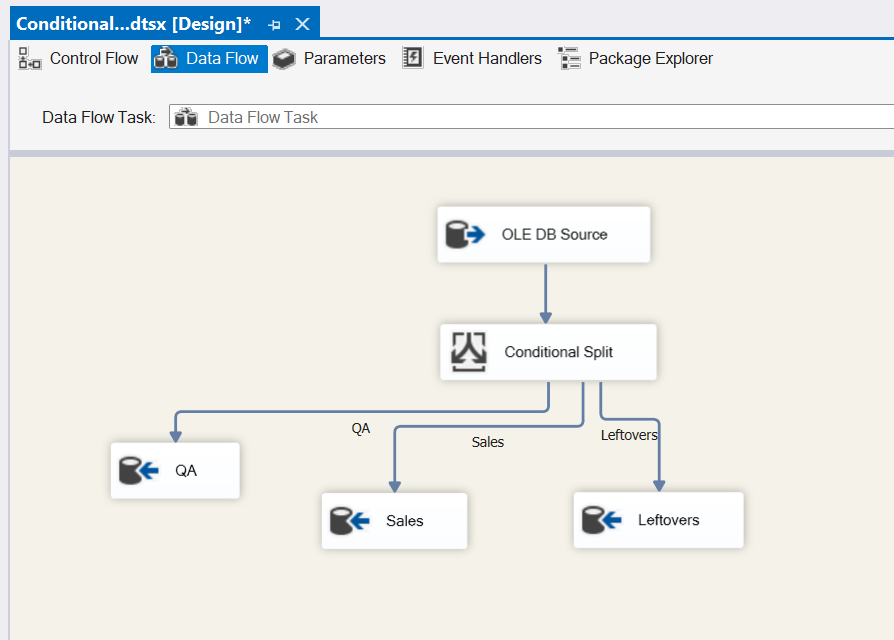
Now that we have QA mapped, go ahead and map Sales and Leftovers.
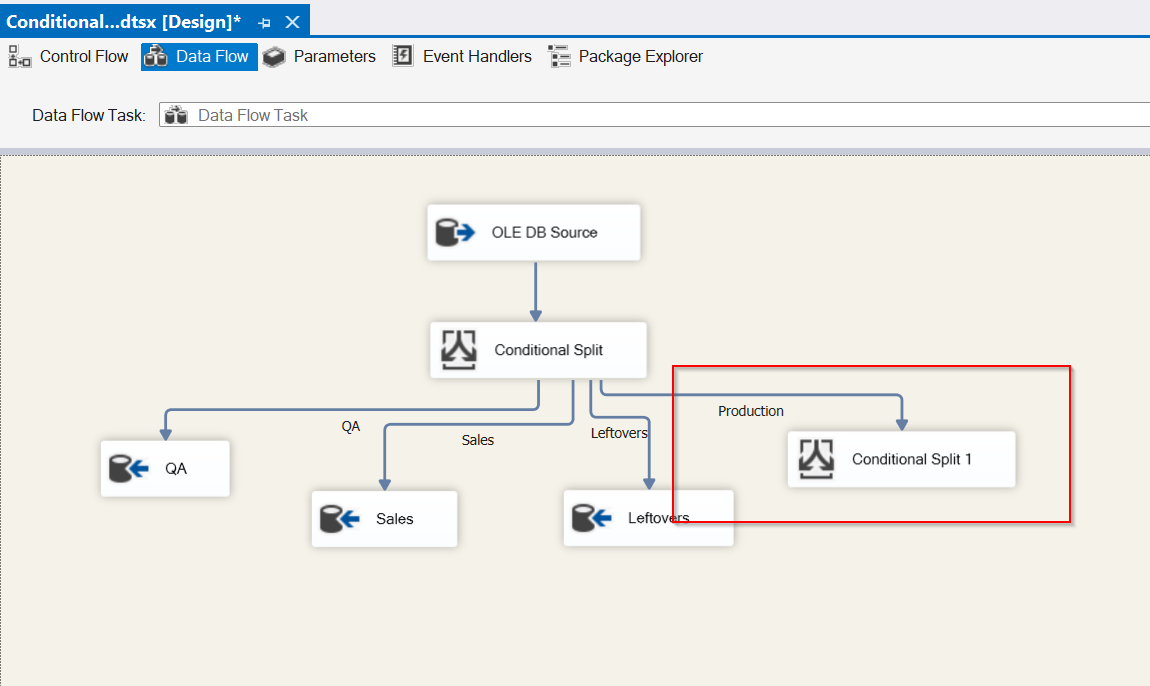
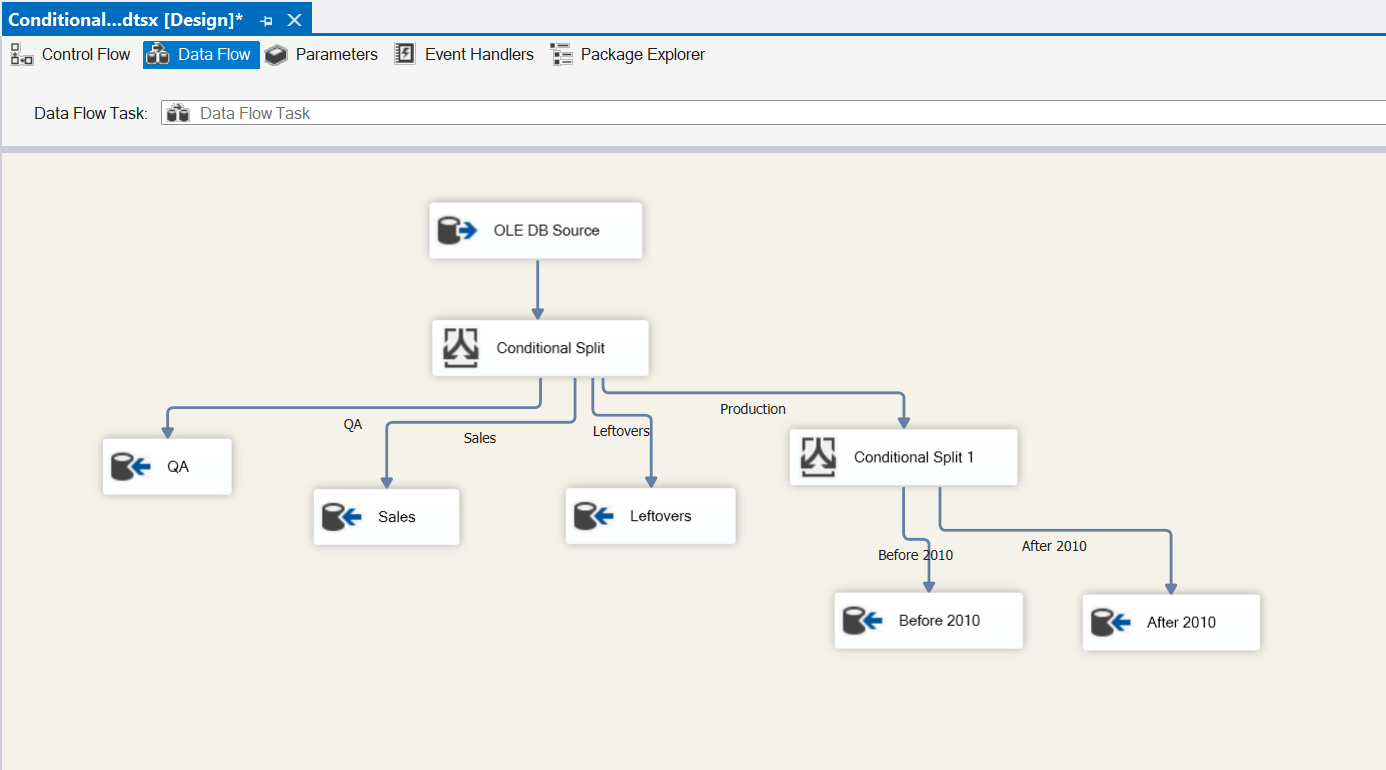
Looks great! QA, Sales and Leftovers are mapped successfully. Let’s take a look at adding another Conditional Split task for Production. Drag a Conditional Split task into the design pane and connect it to the current Conditional Split. It automatically maps to Production since it’s the only output left.
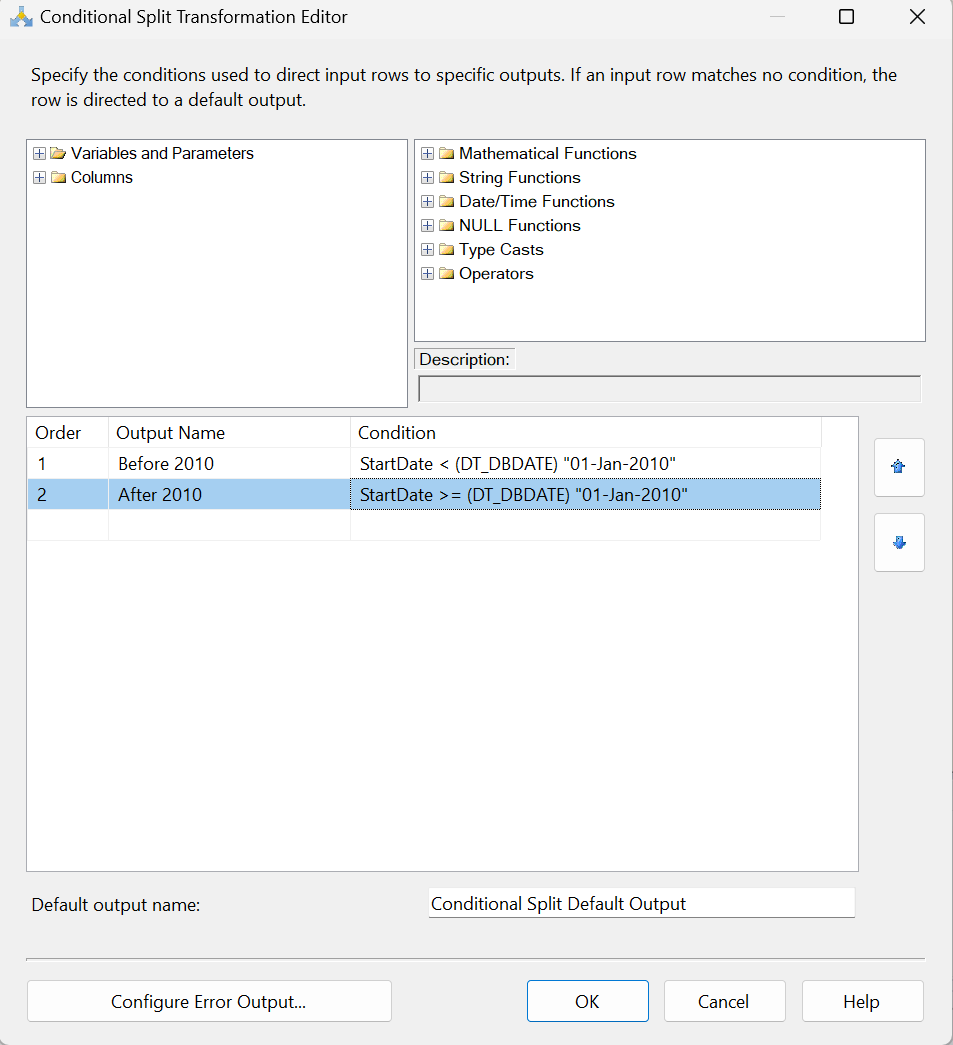
From our new Conditional split task, let’s open the editor and configure the date conditions for Production. We’ll leave the Default output name box as is since we shouldn’t have any leftover data from this split.
Now we can map the two new conditions to their appropriate destinations.
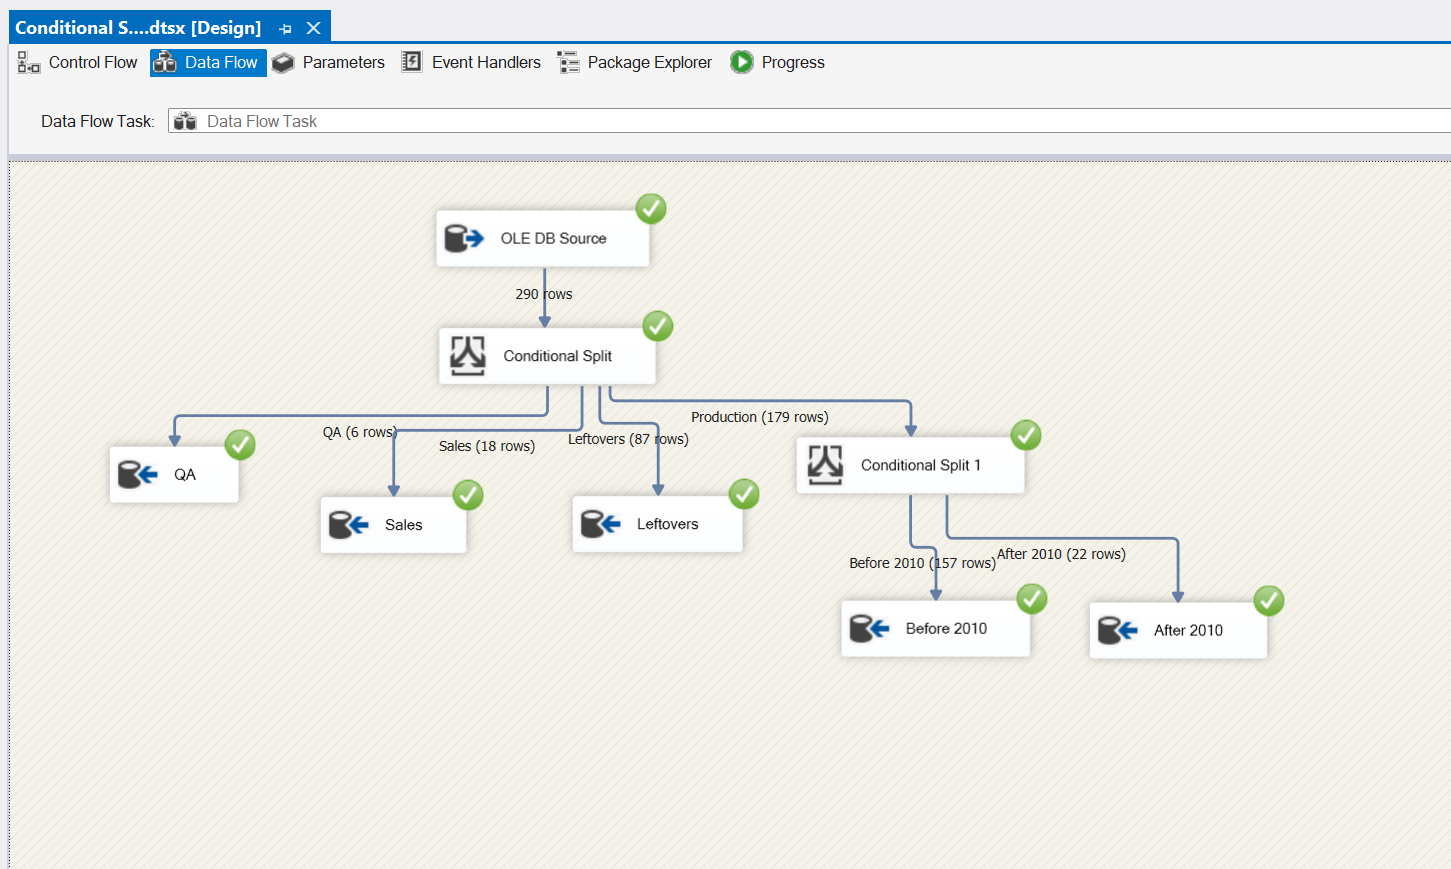
Cross fingers and hit Execute.
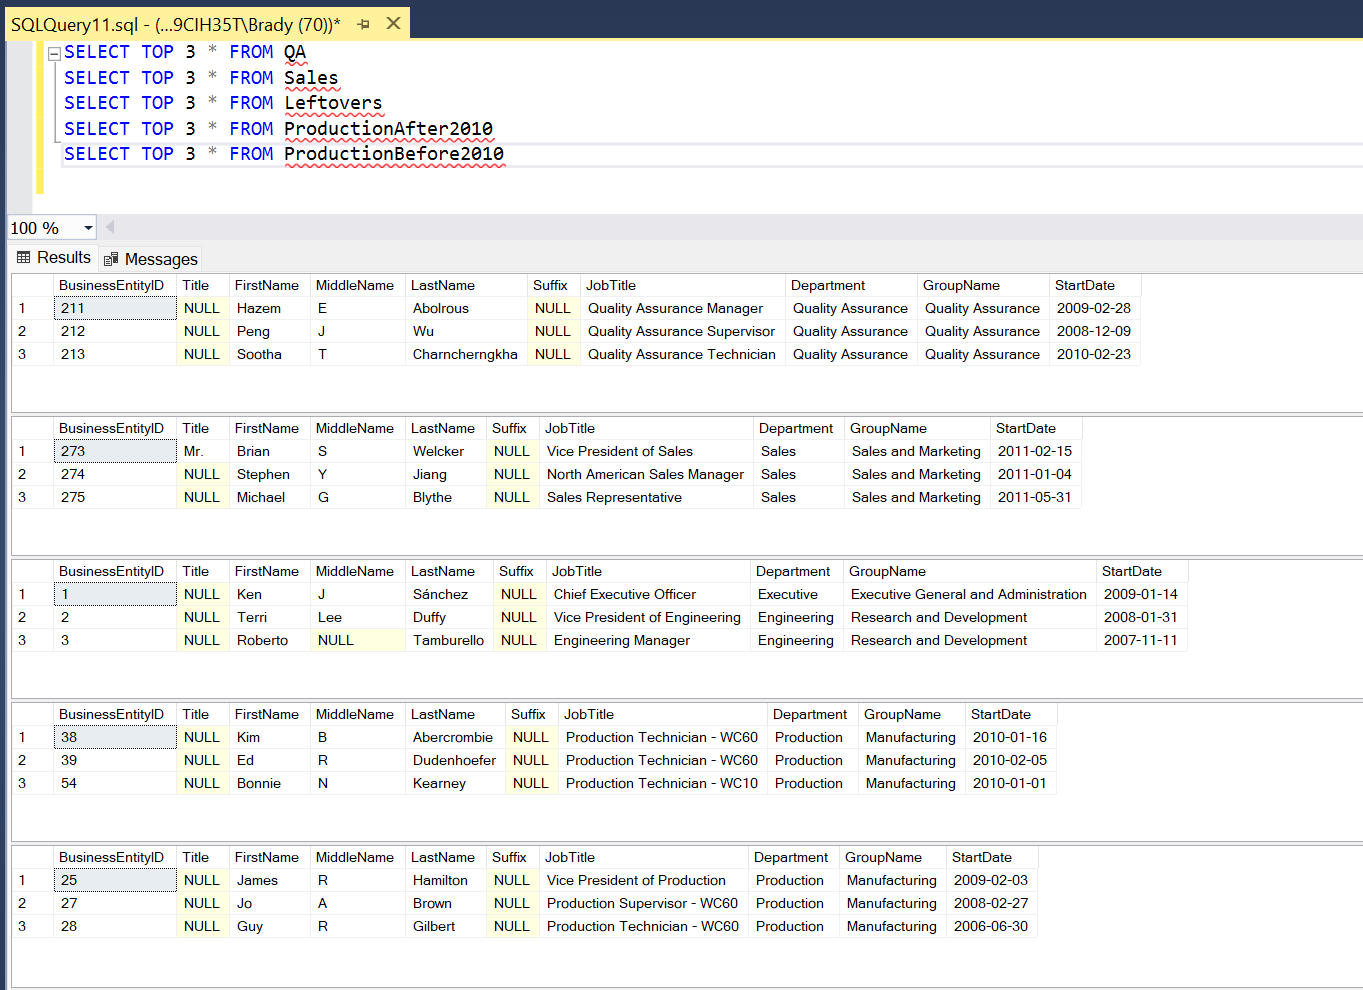
Yay, no red X! Let’s take a look at our SQL tables to make sure everything exported correctly.
Boom. Let’s go grab a bourbon!

