I was asked a question awhile back on the easiest way to do an incremental load from one SQL Server table into another SQL Server table. This is common in data warehouses or reporting tables as you wouldn’t want to truncate a large table and perform a full insert. Instead, you would want to only copy the changes from the source to the destination. This could be an insert or an update. The easiest way, IMO, is SSIS. Let’s take a look.
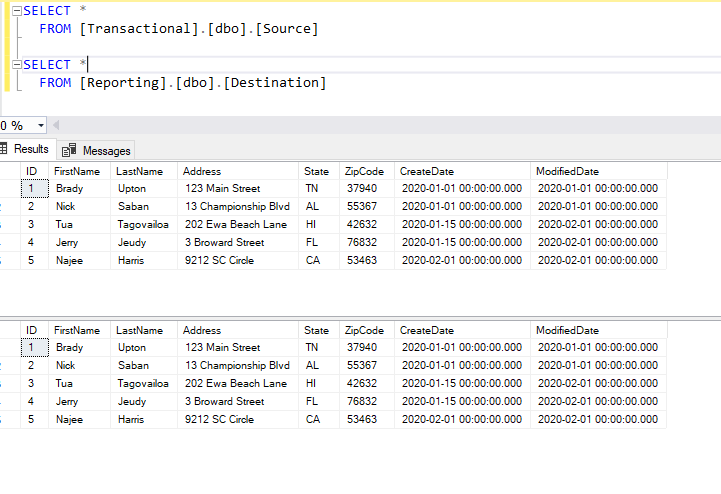
Here’s how my environment is setup. I have two databases appropriately named Transactional (for transactional data) and Reporting (for static report data). Two tables, Source and Destination.
I also added some dummy data as you see below. I’ve highlighted what is different and will need to be changed in the destination table.
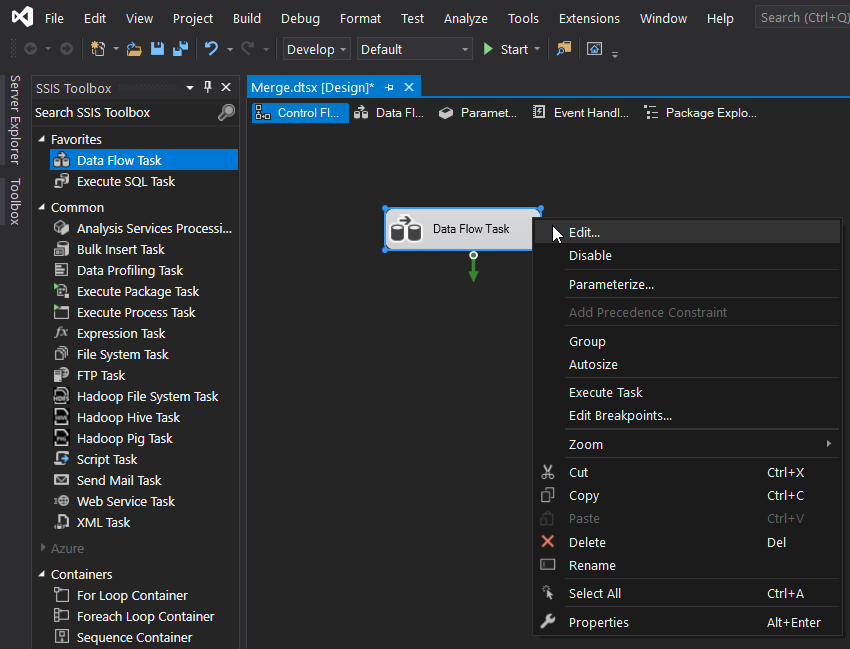
Let’s open SSIS and create a new SSIS project.
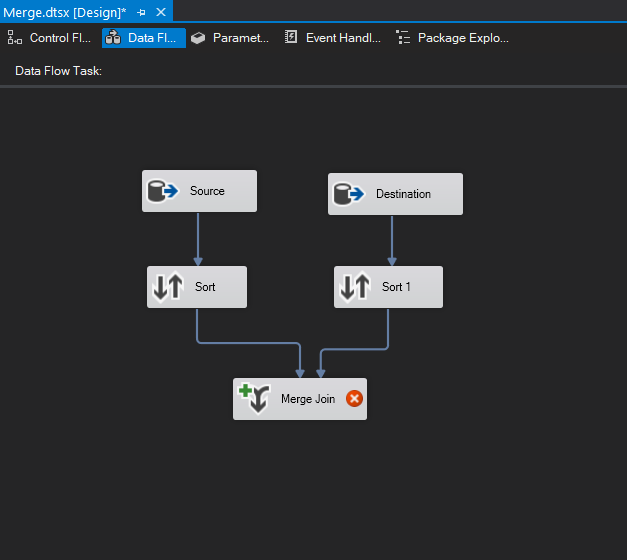
Drag and drop a Data Flow task into the design window, right click, Edit:
Next, drag and drop two OLE DB source components into the design window. I’m going to rename mine Source and Destination to match my table names.
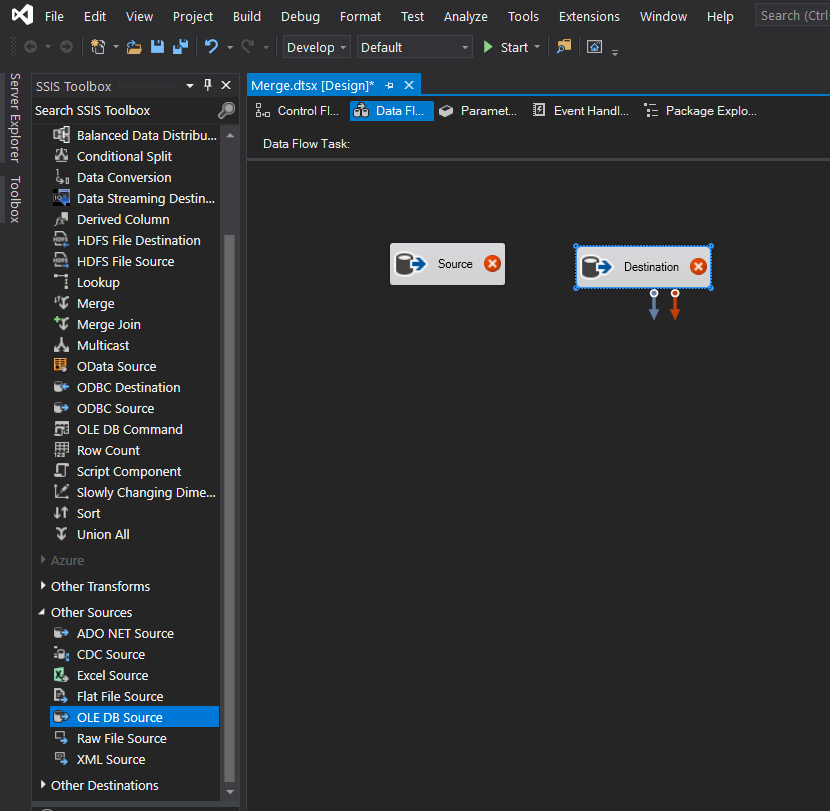
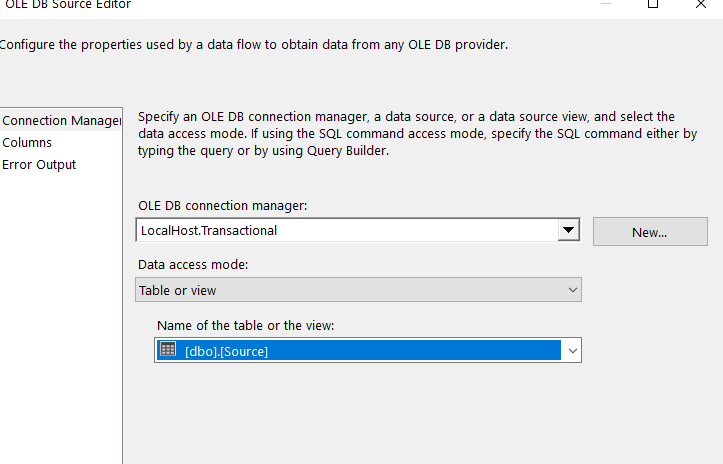
Configure the two OLE DB sources to match the source table and the destination table. Below is a screenshot of my source connection manager.
Once your connection managers are configured let’s drag and drop two Sort components below each OLE DB Source and connect them to each source. We will be using a merge join next and the merge join component needs to have data sorted in ASC or DESC order. I always choose to sort on the Primary Key for each table.
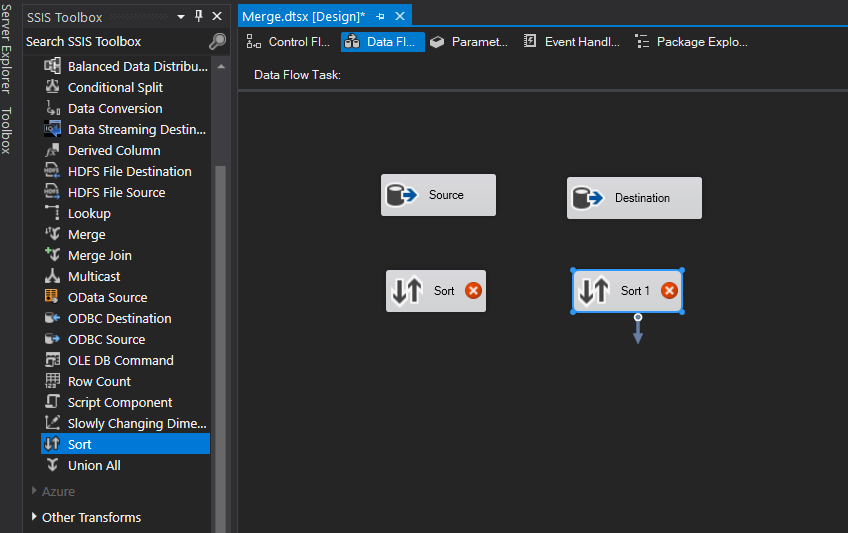
In my example, I’ll choose to sort on my primary key, ID.

Next, drag the Merge Join transformation into the Design window and drag the data path from the Sort component to the Merge Join. When you attach the arrow to the transformation, the Input Output Selection dialog box appears, displaying two options: the Output drop-down list and the Input drop-down list. The Output drop-down list defaults to Source Output, which is what we want. From the Input drop-down list, select Merge Join Left Input, as shown below. We’ll use the other option, Merge Join Right Input, for the other connection.
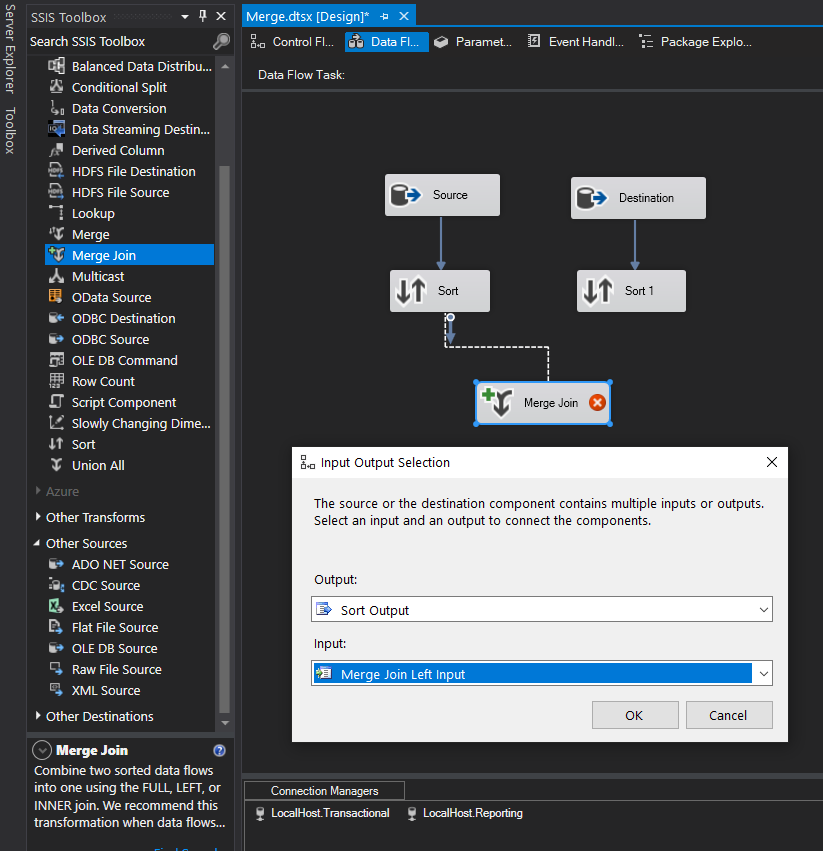
Next, connect the data path from the other Sort component to the Merge Join transformation. This time, the Input Output Selection dialog box does not appear. Instead, the Input drop-down list defaults to the only remaining option: Merge Join Right Input.
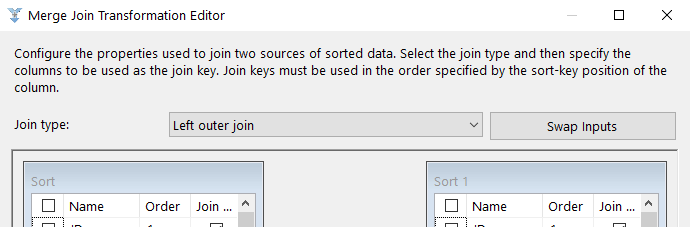
Now, let’s configure the Merge Join transformation.
The first setting in the Merge Join Transformation Editor is the Join type drop-down list. From this list, you can select one of the following three join types:
- Left outer join: Includes all rows from the left table, but only matching rows from the right table. You can use the Swap Inputs option to switch data source, effectively creating a right outer join.
- Full outer join: Includes all rows from both tables.
- Inner join: Includes rows only when the data matches between the two tables.
For our example, we want to include all rows from left table but only rows from the right table if there’s a match, so we’ll use the Left outer join option.
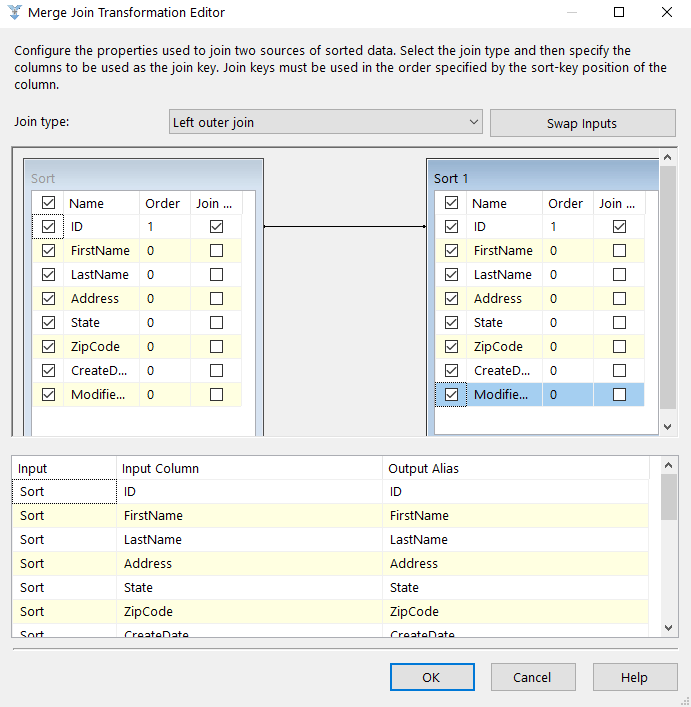
You now need to select which columns you want to include in the data set that will be outputted by the Merge Join transformation. For this exercise, we’ll include all columns. To include a column in the final result set, simply select the check box next to the column name in either data source.
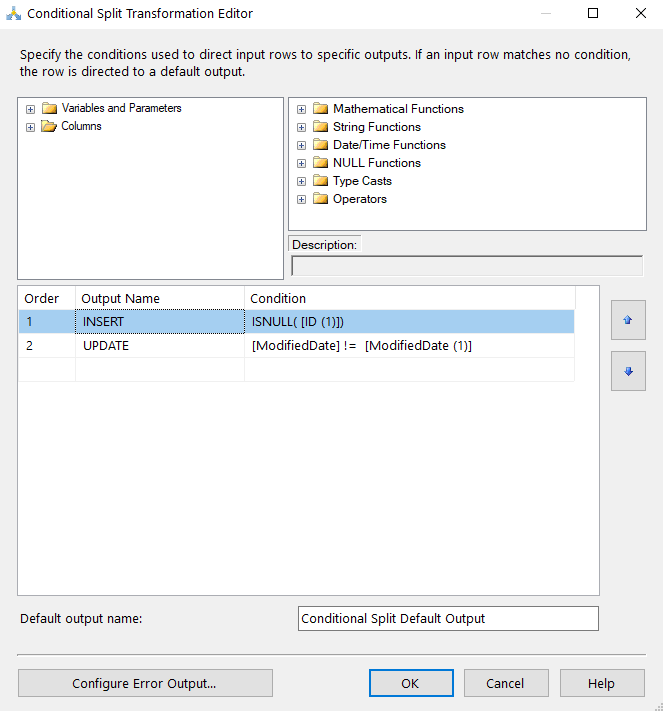
Almost finished, but first let’s add a Conditional Split transformation. This will allow us to insert new records or update previous records.
In the Conditional Split Editor, I created two outputs. If (Destination) ID is NULL then the record doesn’t exist so we’ll perform an INSERT. If the ModifiedDate is different between the two tables then we know something has been updated since the last execution and we need to update the record. See below.
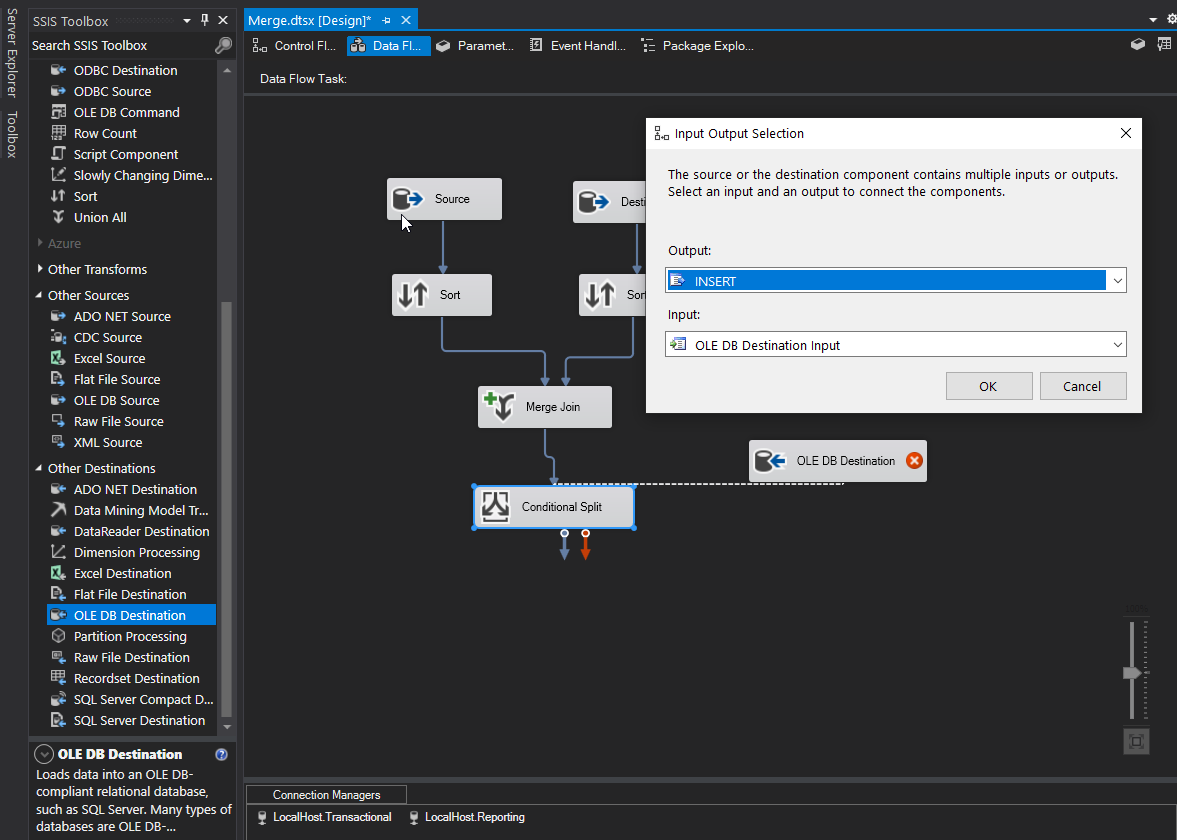
Since we can perform and INSERT or an UPDATE we’ll need two destinations. First, for the INSERT, we’ll simply be doing an INSERT into the table so we can drag the OLE DB Destination component into the window, choose “INSERT” in the Input Output selection window, and use the Reporting connection manager.
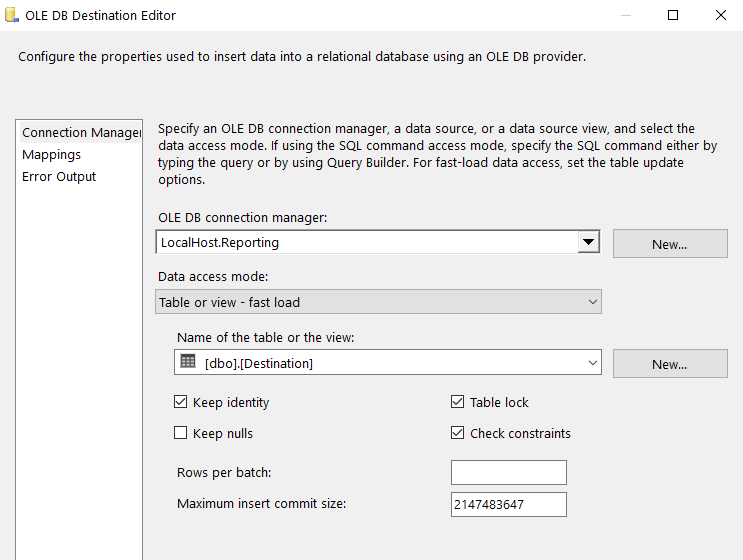
I’m going to check the “Keep Identity” box since the ID column is an identity column.
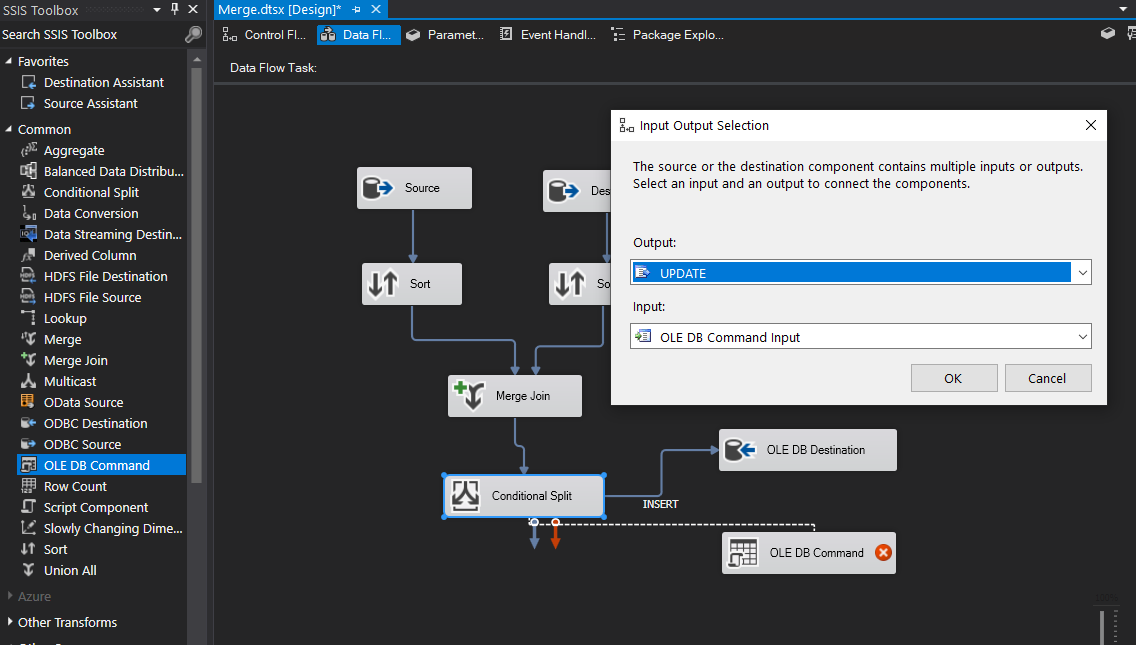
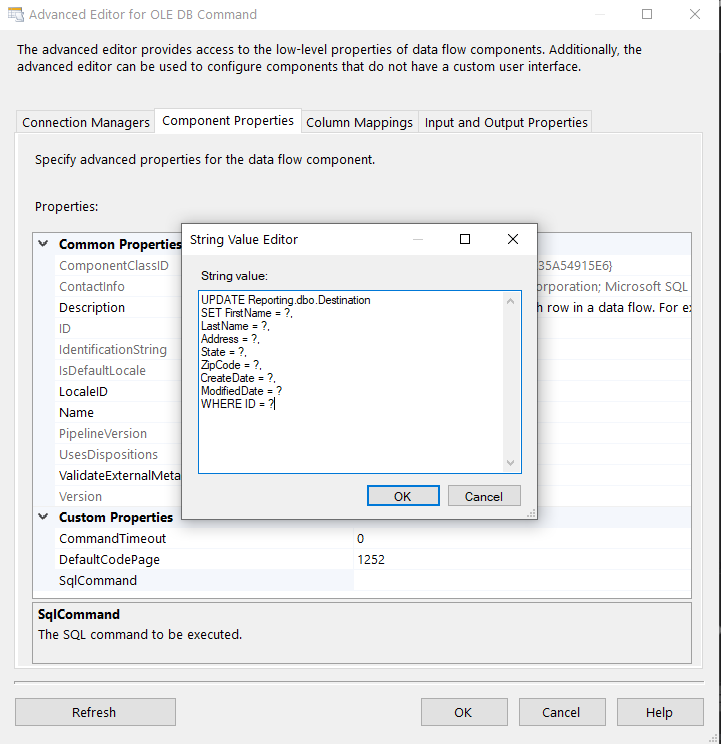
Next, for the UPDATE statement we’ll drag the OLE Command component into the window and configure it. Select “UPDATE” in the Input Output Selection window.
In the Connection Managers tab, assign the connection manager for Reporting.
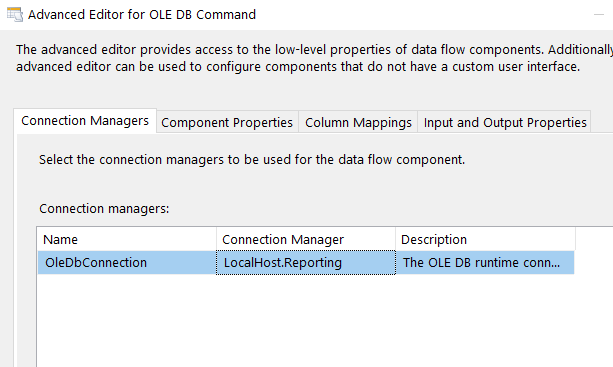
In the Connection Managers tab, assign the connection manager for Reporting.
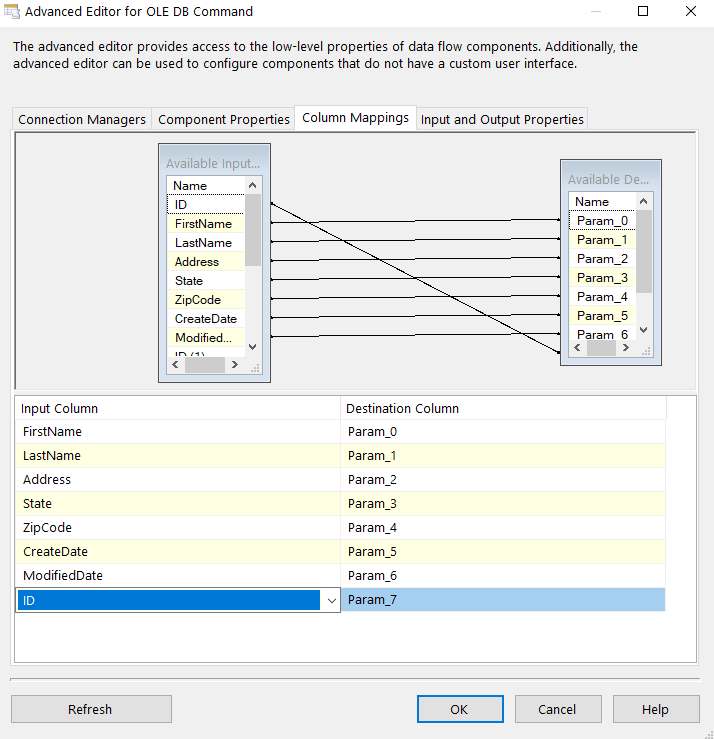
In the column mappings tab, assign parameters:
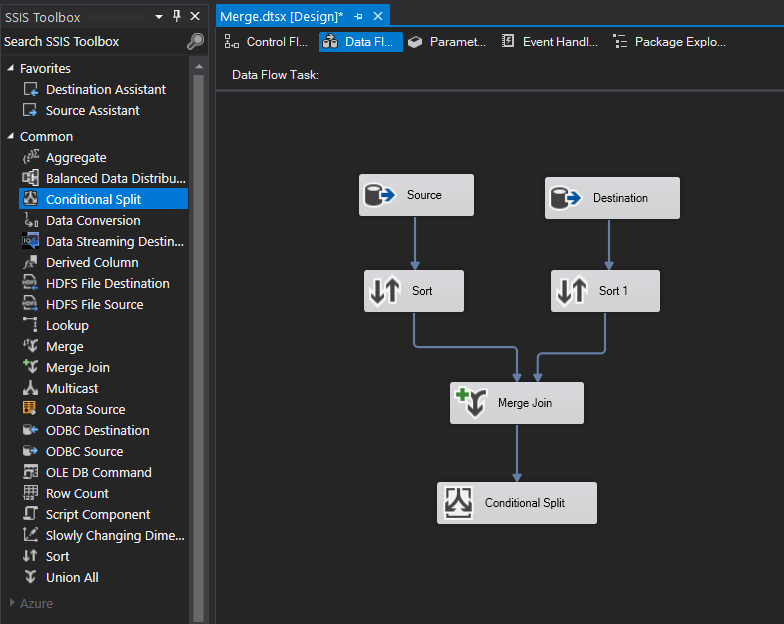
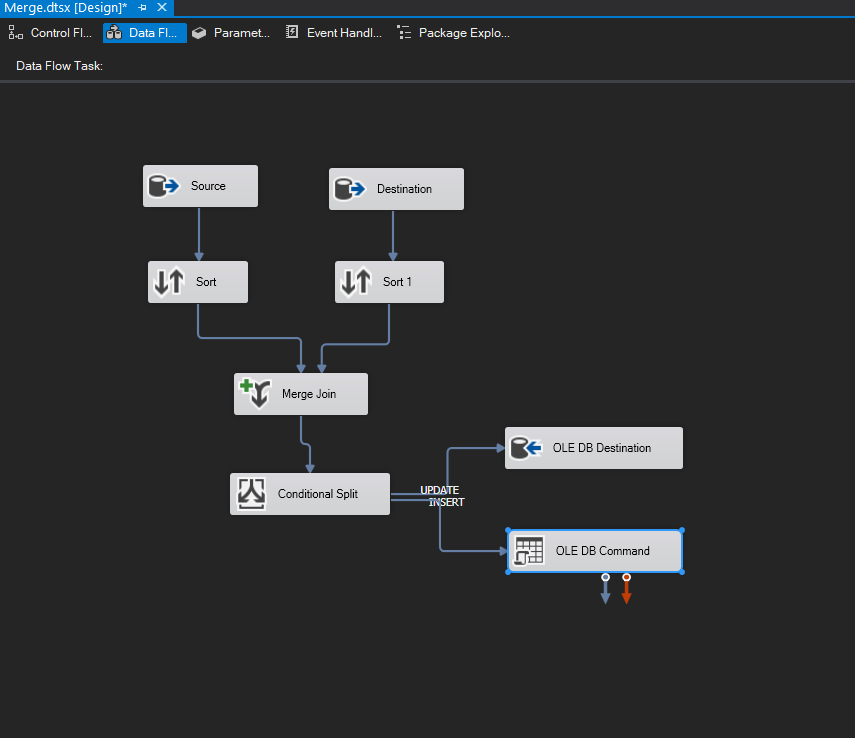
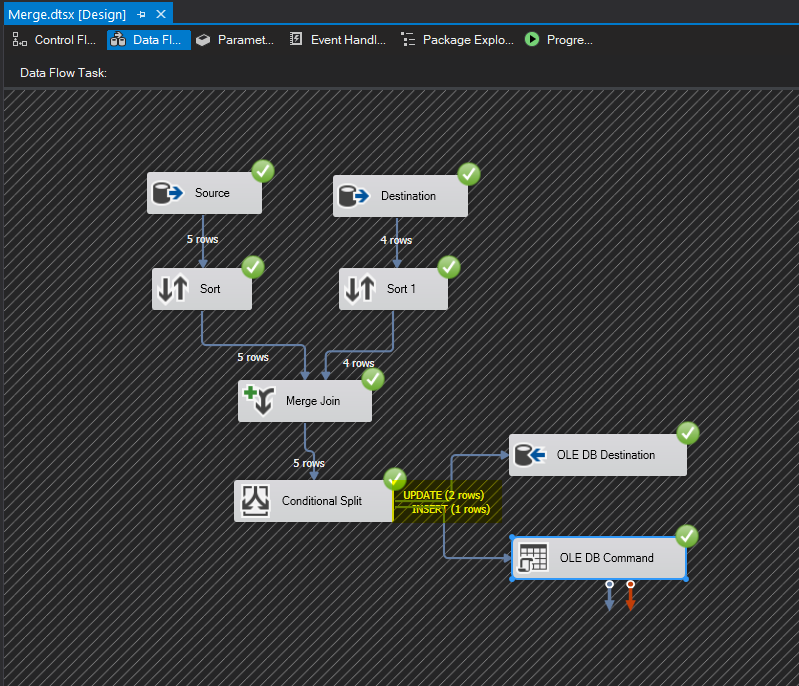
Final package should look like the following:
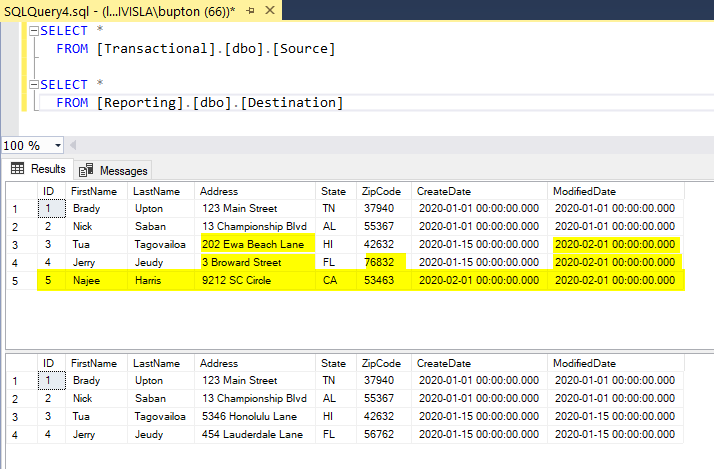
Save and execute. You can see that we updated two records and inserted one record:
Going back to our query you can see that everything matches up now: